
4 Rounds for time of:
10x Barbell Push Press (115 M / 65 W)
10x Barbell Deadlift (225 M / 135 W)
20x Bar Facing Burpees
Barbell Push Press Technique:

Bottom portion of lift

Top portion of lift

Complete motion of lift
Hand placement
Start with your hands just outside of your shoulders or a bit closer, depending on your mobility/flexibility. The key is to be close enough to still get your elbows somewhat under the bar – this gives you more leverage when you start to drive with the upper body.
Wider hand placements are generally used for the jerk; where you get a lot more hip power in comparison to the push press.
This is too tight:

The elbows are close together but drawn forward – not a good leverage position.
This is too wide:

The elbows are too wide to get under the bar.
This is just right:

This position allows you to get your elbows under the wrists.
Elbow Positioning
To lift heavy weights, you must put yourself in the best possible position. The elbows should be placed as close under the bar as possible without sacrificing the rack positioning. This will help you get your shoulders and triceps into the movement – once you have the required momentum from the hips.
Here’s good elbow position:

And this is bad elbow position:

Standing Position
Your standing position in the push press is extremely important. If your weight distribution is off, the initial dip will fall apart, resulting in you having to waste valuable energy to correct it.
What I’ve found to be extremely useful is to lean back. At first it will feel weird, but once you get used to it you’ll experience a huge difference in terms of smoothness and power.
The Dip
The dip has to be focused on staying upright – if the hips dip back, the vector force will go forward and wasted energy must be spent correcting it.
Key Points:
The dip is shallow; around a quarter of the way.
Don’t dip too fast, otherwise you’ll separate from the bar.
Don’t dip back or forward, just straight down. Bend through the legs while keeping your torso straight up.
The Drive
This is where all the momentum comes from. If you’ve followed the above steps, you should be locked and loaded, ready to drive the weight up with force.
Key Points:
- Keep your chest upright.
- Let your legs/hips initiate the movement. Some people tend to be over eager and start pushing with the upper body too quickly. This can screw up the whole pattern and diminish your power output, meaning less weight being pushed.
Bottom line, be patient and let the legs do the work.
Overhead
The final step is the overhead positioning. Here you’ll want the bar to be aligned directly over your center of mass – too far back or forward can create a miss or potentially lead to injury.
Another mistake I see is with head positioning, with some over-exaggerating the head movement. Here you should simply tuck your chin – do not push your head forward! Pushing your head too far forward can cause your body to move forward with it.
Summary of technique….
Hand Placement: A little wider than shoulder-width apart.
Standing Position: Lean back with a straight torso.
Dip: Keep your torso as straight as possible and bend through the legs.
Drive: Initiate the movement with the legs, not the upper body.
Overhead: Bar should be placed over the crown of the head, and head isn’t pushed forward.
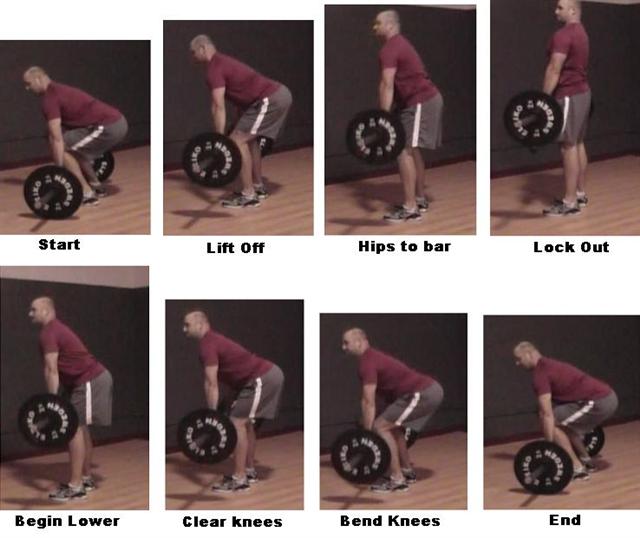
Barbell Deadlift Technique:

Conventional (Left) and Sumo Style Deadlift (Right)
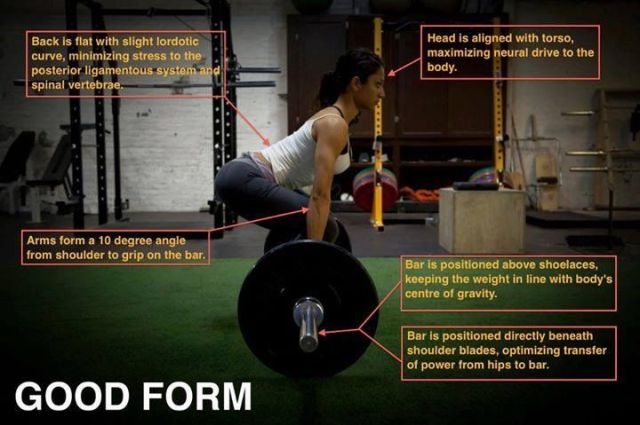
Technique is the number one thing you should look at when you get stuck on Deadlifts. It doesn’t matter which grip you take wether it be sumo or conventional if your technique isn’t good you’ll develop weakness and / or injury, which is definitely something you want to avoid. However, perfect technique will lead to stronger deadlifts and a much lower injury risk. Two things you definitely want.
– Your lower back should be in a neutral position because rounding your lower back can be dangerous particularly when lifting heavier weights.
– Your arms should be straight at all times. Bending them could lead to bicep tears.
– Your abs and lats should be tight throughout the duration of each and every rep. This will help to stop your lower back from rounding and keep your spine in a neutral position.
– Keep the bar close to your body at all times. If it moves away from your body you’ll put extra unneeded stress on your lower back and this will drastically limit the amount of weight you can lift. There’s a reason the best deadlifters have scars on their shins.
Here’s how to deadlift in 5 easy steps:
1) Stand with the bar above the center of your feet — your stance should be a bit more narrow than shoulder-width to give your arms room.
2) Grab the bar overhand so your arms are vertical to the floor
3) Bend through your knees until your shins hit the bar which remain above the middle of your feet. Shoulder blades directly over the bar.
4) Lift your chest but don’t squeeze your shoulder blades. Just put your shoulders back and down, head inline with the rest of your spine.
5) Pull by keeping the bar close to your body, roll it over the knees and thighs until hips and knees are locked. Do not lean back at the top.
Bar Facing Burpees Technique:

Everyone knows how much I love burpees and all the variations. Here is one of my favorites, the bar facing burpee (insert evil laugh here).
Standard technique is for your body to be perpendicular to the bar, touch your chest and thighs to the floor and then jump over the bar with your feet together. You may take a small step forward before jumping over. If you have knee issues feel free to step over the bar instead of jumping. Once you jump over the bar, turn around and perform another burpee before jumping the bar again.
And now, here are five reasons why burpees are awesome—and why they should be your new favorite exercise:
1) They burn mega calories
Burpees make your body a fat burning machine.
That’s because since burpees are an intense fully body exercise, they burn a ton of calories. Plus, research shows that high intensity exercises like burpees burn up to 50% more fat than moderate exercising.
And better yet, they speed up your metabolism throughout the day—meaning you’ll burn more calories all day long, even after your burpee hell is over.
So if you want to lose weight, ditch the recumbent bike and elliptical machine—and do some burpees instead.
2) They make you stronger
The burpee is a full body strength training exercise and the ultimate example of functional fitness.
With every rep, you’ll work your arms, chest, quads, glutes, hamstrings, and abs. After a few sets of burpees, your legs should feel a little bit like lead.
3) They’re great for conditioning
Why do you think burpees are embraced in the hardest of workouts (like CrossFit)?
Because they’re great for developing conditioning and endurance! And they get your heart rate up—fast.
Burpees are a great way to get in shape quickly, whether your goal is to learn a new sport, train for a triathlon, hike a big mountain, or, just to look good.
4) They’re portable and require no equipment
The best thing about burpees? They require absolutely no equipment.
That’s right. Zip. Zero. Zilch.
You can do burpees in your house, in a nearby park, even in your hotel room!
5) You can add them to almost any workout
Unlike running, which is a slow, monotonous form of exercising (unless you’re sprinting), burpees are fast paced, dynamic, and never boring.
Like I already mentioned, adding burpees to your workout routine will bring you tons of benefits and whip you into shape quicker than you ever thought possible.
Remember to practice safe technique and follow my instructions. The prescribed weights are heavy so please modify as necessary as to complete the workout and not get injured. This is meant to challenge you….not destroy you.

15 min
Push press at 45-45-35-35
Dead lift at 105
Burpee with a bosu
43/ 13:53
push press 40#, dead lift 105#
47 yrs
15:25
55 # push press
135 #dead lift
34 / 15:29
37
22:30
105 lb dead lift
15x push-ups instead of push press
43/ 17:15 push press 30 lbs, deadlift 115lbs
correction to deadlifts – 120 lbs